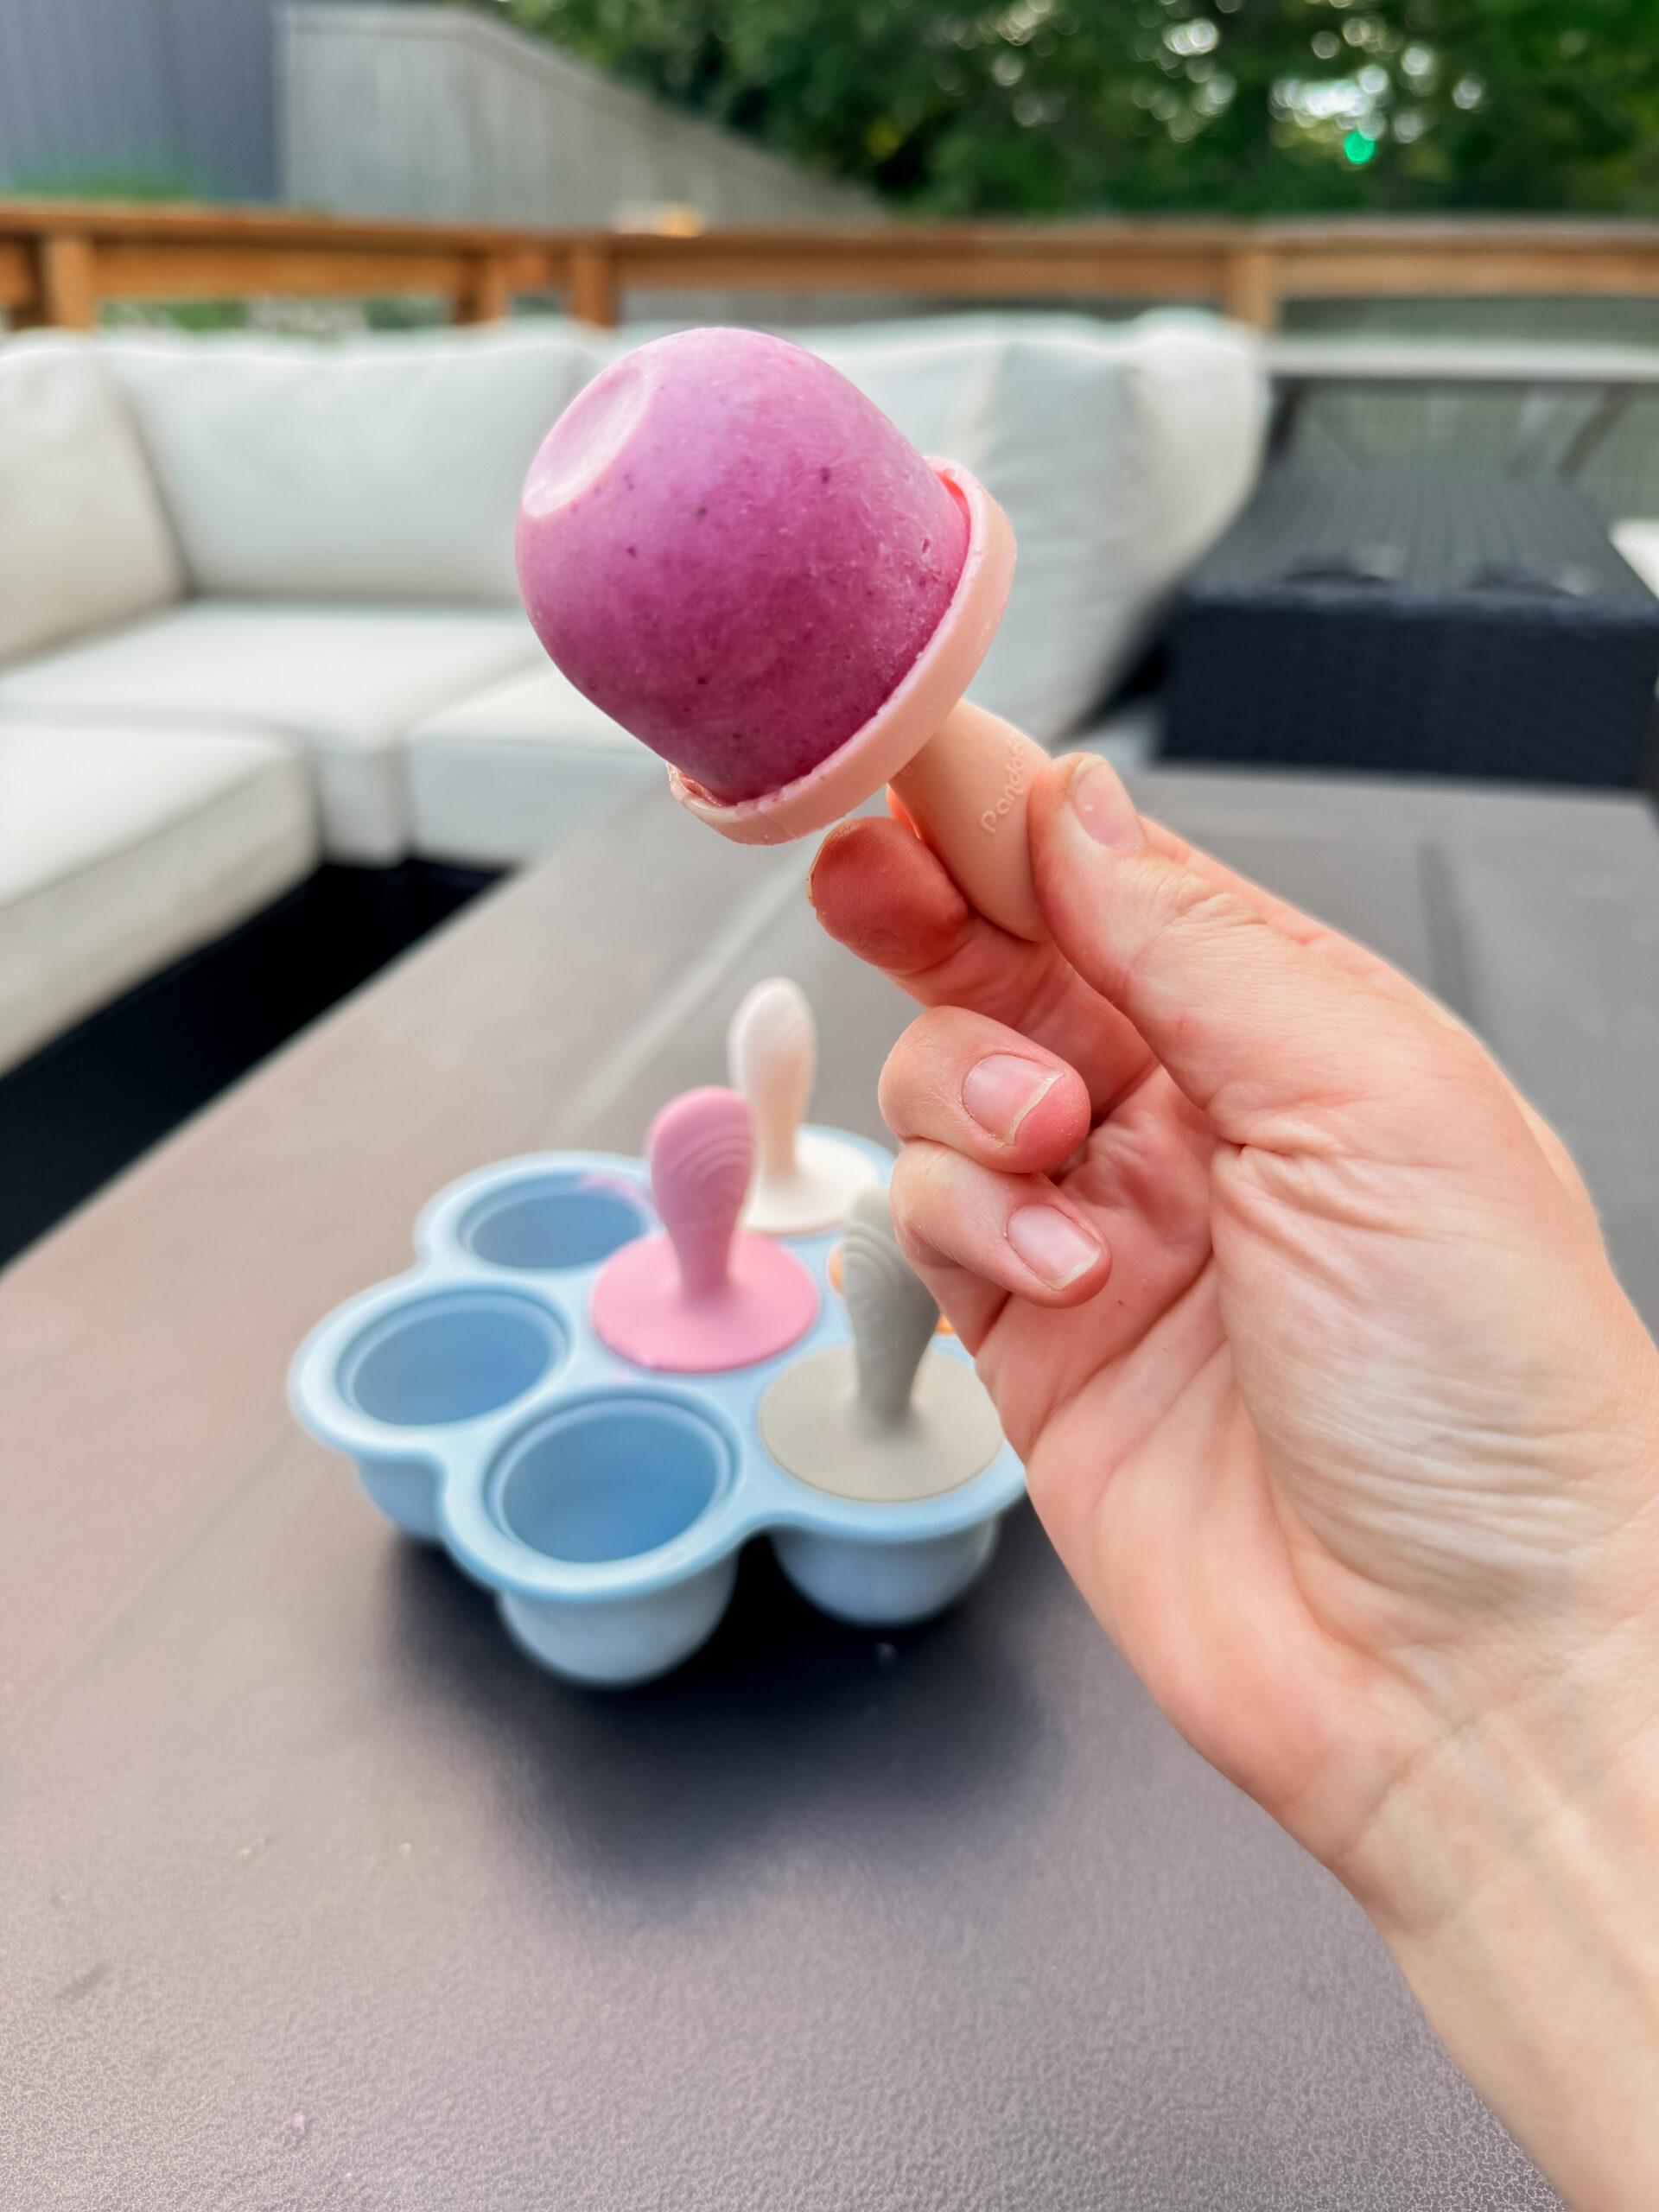
When the weather warms up, I’m always looking for snacks that feel fun and refreshing while still offering a little staying power. These 5-ingredient Coconut Berry Popsicles were my 3-year-old daughter’s brainchild (she adamantly wanted “banana coconut berry popsicles”) and have become a favorite in our house because they’re naturally sweet, incredibly easy, and made with just a handful of nourishing ingredients.
Unlike many store-bought popsicles that are mostly juice and added sugar, these are balanced with fats from coconut milk, protein from Greek yogurt, and fiber from fruit and chia seeds. The result is a creamy frozen treat that satisfies without the dramatic blood sugar spike that can leave kids (and adults!) hangry again 20 minutes later.
They’re perfect as an afternoon snack, a cooling summer treat, and are even healthy enough for breakfast alongside other protein-rich foods!
Best of all, all you need is a blender and a popsicle mold. Cheers to summer!

Ingredients for Easy Coconut Berry Popsicles (makes 8 mini popsicles)
- ½ cup Greek yogurt, dairy or plant based
- ¾ cup coconut milk (or sub milk of choice)
- 2 cups frozen fruit (I used banana and mixed berries)
- 1 Tbsp hemp hearts
- 1 tsp chia seeds
Instructions for Coconut Berry Popsicles
- Add Greek yogurt, coconut milk, frozen fruit, and chia seeds to a blender. Blend until smooth and creamy.
- Pour mixture evenly into popsicle molds (I love these mini silicone molds).
- Freeze for at least 4–6 hours, or until completely firm.
- Pop out of silicone molds (or run standard molds briefly under warm water to release) and serve. Enjoy!
Easy Coconut Berry Popsicles (No Added Sugar)
Ingredients
Method
- Add Greek yogurt, coconut milk, frozen fruit, and chia seeds to a blender. Blend until smooth and creamy.
- Pour mixture evenly into popsicle molds.
- Freeze for at least 4–6 hours, or until completely firm.
- Pop out of silicone molds (or run standard molds briefly under warm water to release) and serve. Enjoy!
Notes
Nutrition Info (per serving):
~332 calories, 16 g fat (2 g saturated), 32 g carbs (2 g fiber, 0 g added sugar), 14 g protein
Why You’ll Love These Easy Coconut Berry Popsicles
- Naturally sweetened with fruit
- Contains healthy fats, fiber, and protein
- Kid-friendly and parent-approved
- No cooking required
- Great for hot summer days
- Easy to customize with different fruits
- Freezer-friendly for weeks
FAQs
Can I make these Easy Coconut Berry Popsicles dairy-free?
Yes! Simply use a dairy-free Greek-style yogurt such as soy, coconut, or almond-based yogurt.
What fruit works best?
Almost any frozen fruit works well. Bananas help create the creamiest texture, while berries add sweetness and color.
How long do they keep?
Store in the freezer for up to 3 months.
Can I make these without popsicle molds?
Absolutely. Freeze the mixture in small paper cups and insert popsicle sticks once partially frozen.
Why add chia seeds?
Chia seeds add fiber, healthy fats, and help create a slightly creamier texture.
Can I add protein powder?
Yes. A scoop of vanilla protein powder blends in nicely if you’re making these for older kids or adults.
More Healthy Kid-Friendly Snacks You’ll Love
- Healthy Sweet Potato Banana Muffins
- Mango Chia Seed Pudding (High-Protein, Meal Prep Friendly)
- 5-Ingredient Banana Bread Mini Muffins (Flourless & Gluten-Free)
- Strawberry Thumbprint Brownie Bites (High-Fiber + Kid-Friendly)
Affiliate disclosure
This post may contain affiliate links. If you click through and make a purchase, I may earn a small commission at no extra cost to you. I only share products I truly use and love. Thank you for supporting my work and helping me continue to share easy, plant-forward recipes!